Devlog #2 - Multiplayer with Photon
For networking, I chose Photon PUN, designed for multiplayer games which offers matchmaking and room creation functionalities. The goal is to establish a connection to the master server, allowing players to join a lobby before expanding onto creating/joining rooms. I decided to set up the photon networking first so the gameplay programmers can start creating the player mechanics and sync them across the network.
This week, I planned to set up photon in Unity and create a simple script which connects to the master server.
Why Photon PUN?
I chose the PUN framework as it's tightly integrated with Unity which makes it easy to set up and use. PUN makes it easy to create lobby-based or room-based multiplayer systems.
Connecting to Photon PUN
One of the first challenges is setting up a seamless connection system. Using Photon PUN, I've implemented the core mechanics that allow players to connect to a game effortlessly.
The first step was integrating Photon PUN into the project to handle networking. With this, the game can connect to the Photon Master Server, ensuring a stable multiplayer experience without the need for dedicated servers.

Setting Up the Master Server Connection
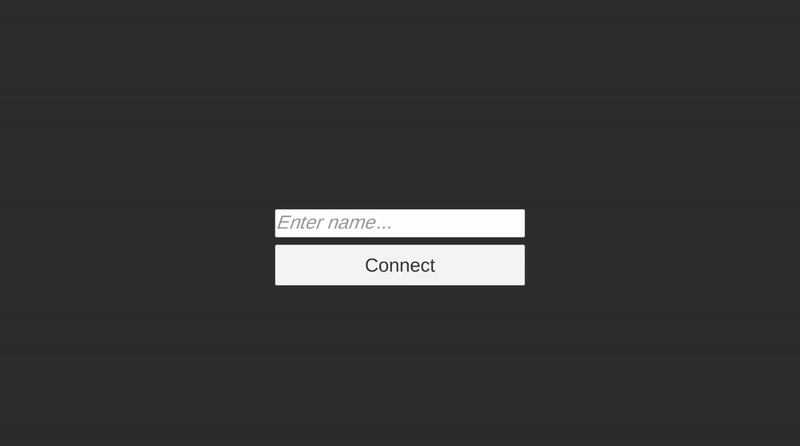
The ConnectToServer script allows the player to enter a nickname and connect to the server.
ConnectToServer.cs

")
OnConnectToMaster() is a pun callback that is called automatically when the client is connected to the master server and is ready to join/create rooms.
Creating a Unique Username
To make things more personalised, I added a simple system that lets players create their own nickname. This name is then stored and displayed in the lobby.

Connecting to the Master Server
Once a player has set their nickname, they can click the "Connect" button. This action takes them directly to the game lobby, where they can see other connected players. and prepare to jump into a match.
Next Steps...
The next step is to implement a lobby scene where players can join and create their own rooms. These rooms will allow players to join, leave and start the game.
References
[1] Photonengine. Setup and Connect (Version PUN 2). Available at: https://doc.photonengine.com/pun/current/getting-started/initial-setup .
[2] Photonengine. Introduction (Version PUN 2). Available at: https://doc.photonengine.com/pun/current/getting-started/pun-intro.
Leave a comment
Log in with itch.io to leave a comment.